The Planck keyboard layout has gained significant attention in recent years due to its compact design and ergonomic benefits. This comprehensive guide aims to explore the intricacies of the Planck keyboard layout, its history, advantages, and how it differs from traditional keyboard designs. Whether you’re a seasoned enthusiast or a newcomer to the world of mechanical keyboards, this guide will provide valuable insights into the Planck layout and help you understand its unique features.
Planck Keyboard Layout
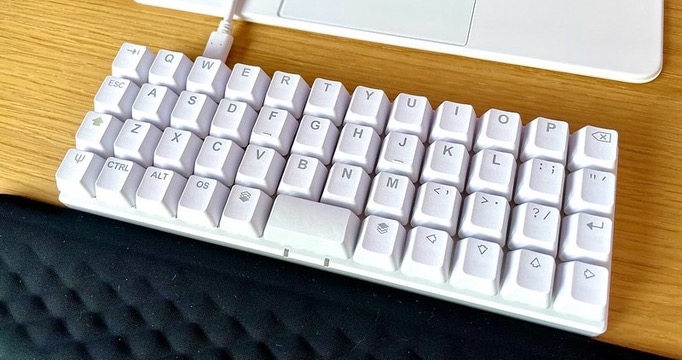
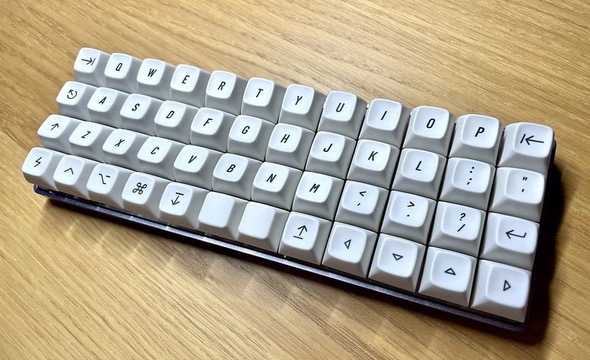
The Planck keyboard layout is a compact, ortholinear keyboard design that prioritizes efficiency and ergonomics. Unlike traditional staggered layouts, the keys on a Planck keyboard are arranged in a grid, with each key directly above or below its neighboring keys. This arrangement reduces finger movement and promotes a more natural hand position, potentially reducing the risk of repetitive strain injuries.
The History
The Planck keyboard layout was conceptualized by Jack Humbert and developed as an open-source project within the mechanical keyboard community. Its name pays homage to Max Planck, the renowned physicist who originated quantum theory.
Advantages
- Ergonomic Benefits: The compact nature of the Planck layout allows for a more comfortable and natural hand position, reducing strain on the wrists and fingers;
- Efficiency: With all keys within easy reach, users can type more efficiently, minimizing hand movement and increasing typing speed;
- Customization: The open-source nature of the Planck layout enables extensive customization, allowing users to tailor the keyboard to their specific preferences.
The following table illustrates a comparison between traditional keyboard layouts and the Planck layout:
| Aspect | Traditional Layout | Planck Layout |
|---|---|---|
| Key Arrangement | Staggered | Ortholinear |
| Size | Larger footprint | Compact and minimal |
| Finger Movement | Greater | Reduced |
| Ergonomics | Standard | Improved |
| Customization Options | Limited | Extensive |
Building a Planck Keyboard
Building a Planck keyboard can be an exciting and rewarding endeavor, offering enthusiasts the opportunity to customize their typing experience according to their preferences. This section will delve into the process of assembling a Planck keyboard and highlight the components required for the build.
Components Required
Before embarking on the construction of a Planck keyboard, it’s essential to gather the necessary components. These typically include:
- PCB (Printed Circuit Board): The PCB serves as the foundation of the keyboard, providing electrical connections for the switches and microcontroller;
- Switches: Mechanical switches are integral to the typing experience, and enthusiasts can choose from a wide array of options based on their tactile preferences;
- Keycaps: Customizable keycaps allow users to personalize the appearance and feel of their keyboard;
- Case: The case houses the keyboard’s components and contributes to its overall aesthetics and stability;
- Microcontroller: This component acts as the brain of the keyboard, processing input from the switches and transmitting it to the computer.
Assembling the Planck Keyboard
Once all the components are gathered, the assembly process involves several key steps:
- Soldering: Attaching the switches to the PCB requires precision soldering to ensure a secure and reliable connection;
- Installing Keycaps: After the switches are in place, enthusiasts can install and customize the keycaps according to their preferences;
- Programming: Configuring the keyboard layout and functions through firmware allows users to tailor the keyboard to their specific needs.
Programming and Customization
One of the most compelling aspects of the Planck keyboard layout is its extensive customization potential. Users have the freedom to program and modify various aspects of the keyboard to suit their individual preferences, making it a versatile choice for a wide range of typing styles and workflows.
QMK Firmware
The Planck layout is compatible with the QMK firmware, a powerful and flexible open-source firmware that enables users to customize every aspect of their keyboard. From remapping keys to creating complex macros, the QMK firmware empowers users to tailor their typing experience with unparalleled granularity.
Keymap Configuration
The keymap defines the function of each key on the keyboard, allowing users to assign specific actions or commands to individual keys. This level of customization enables users to optimize their workflow and streamline common tasks, enhancing productivity and comfort during extended typing sessions.
Example Keymap Configuration
Below is an example of a customized keymap configuration for a Planck keyboard:
| Key | Function |
|---|---|
| Tab | Tab |
| Enter | Enter |
| Space | Space |
| Shift | Layer Modifier |
| A | Ctrl + A (Select All) |
| S | Ctrl + S (Save) |
| D | Ctrl + D (Duplicate) |
This example demonstrates how users can assign specific functions to keys, tailoring the keyboard to their preferred shortcuts and commands.
Conclusion
In conclusion, the Planck keyboard layout offers a compelling combination of ergonomic benefits, customization options, and a compact design. Its ortholinear key arrangement and open-source nature make it an attractive choice for enthusiasts seeking a personalized and efficient typing experience. By understanding the history, construction, customization, and ergonomic implications of the Planck layout, users can make informed decisions about integrating this innovative keyboard design into their daily workflow.